How to install Neos CMS 9 on Linux
Neos is an open source content management system. It is more popular for its security and inline content editing feature. Recently Neos Team done with official release of Neos CMS 9. We will see all the features of Neos CMS in a separate article. If you are curious about features you may visit on official website.
Let’s start with a fresh new setup & installation. 🙂
Prerequisites to start with Neos CMS 9
| PHP | 8.2 – 8.4 |
| MySql | >= 8.0.14, < 8.4.0 |
| PostgreSQL | Not Supported Yet |
| Web Server | Apache, Nginx |
| Composer | Composer >= 2.1 |
| Supported Graphic Libraries | PHP-GD2, ImageMagick, GraphicsMagick, VIPS |
| Supported Browsers | All Modern browsers |
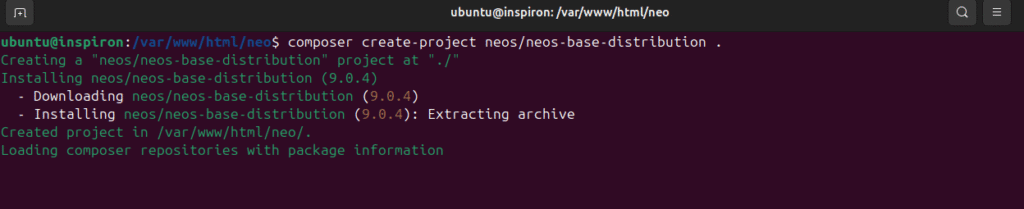
Step 1 – Setup a new project via composer (Using a command line)
#
# with native Composer:

composer create-project neos/neos-base-distribution <project_dir>

# Where <project_dir> is the directory name of your local setup.
# This will install necessary packages on your system
This will install all the required dependencies. Once done you can start with actual setup.
Step 2 – Start Embedded Server
#
#Go to your project directory and run the following command.

./flow server:run

# After a few seconds,the following output will be shown:
# Server running.
# Please go to http://127.0.0.1:8081 to browse the application.
Step 3 – Setup a virtual host
Basically you can skip this step if you want to go with step 2. But I would suggest to create a virtual host on your Linux system so that you can easily access your project
You can setup your virtual host with this tutorial.
( In my case I have given domain name http://neo.local )
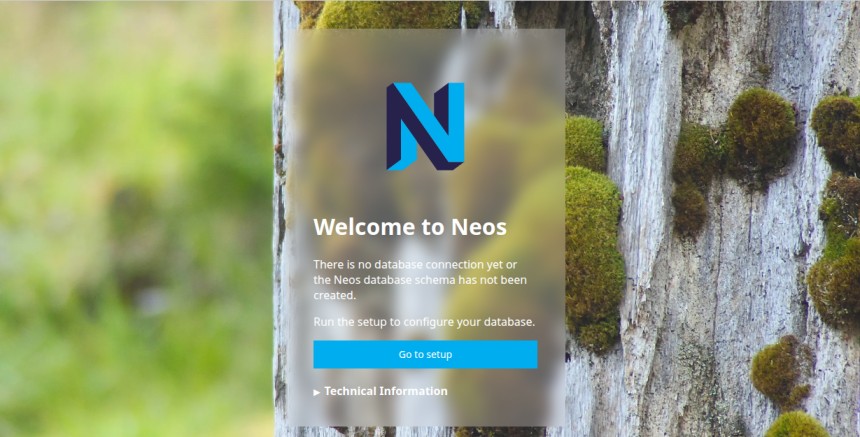
Step 4 – Visit the setup
Now, go to http://neo.local/setup in your browser, and you get redirected to the setup tool.
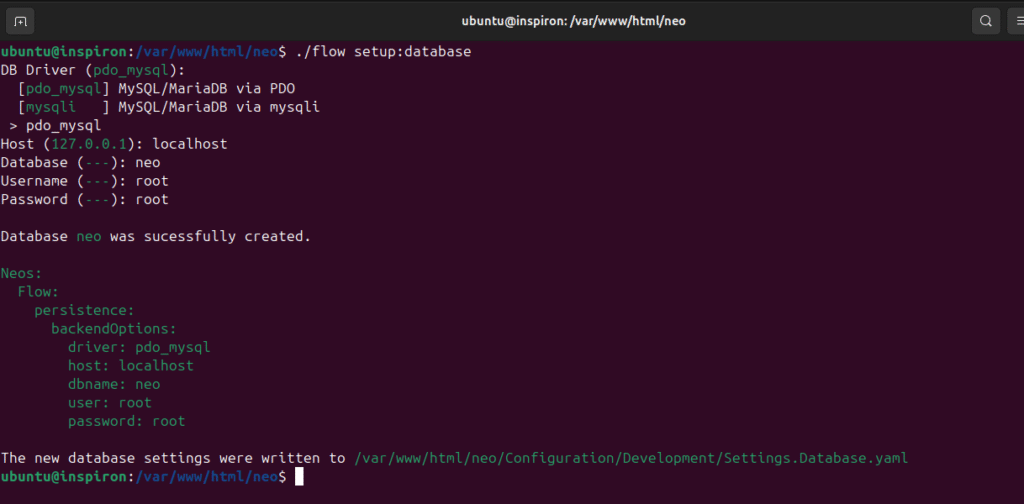
Step 5 – Database Setup
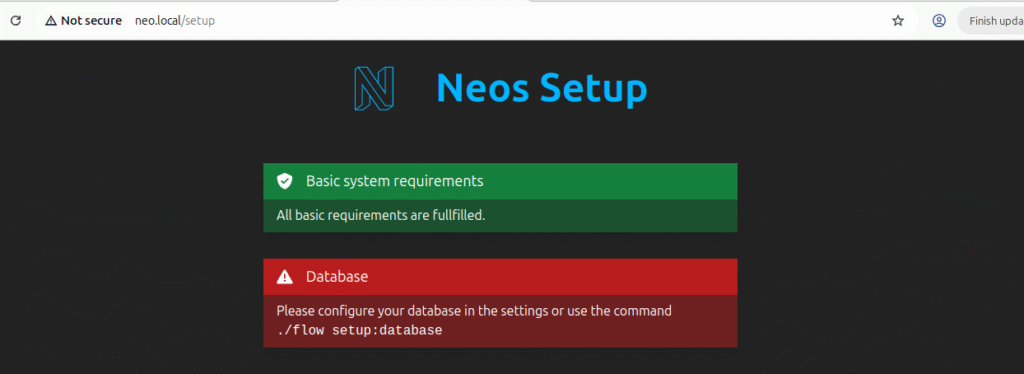
#
#Now do a db setup first

./flow setup:database

#it will ask you for host, db name, username & password
Step 6 – Doctrine Migration
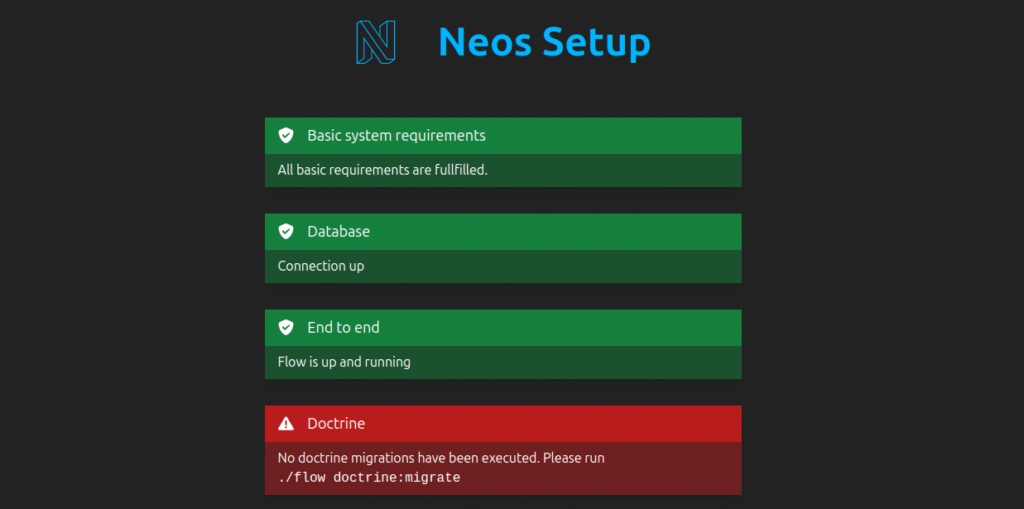
#
#Create & update db schema

./flow doctrine:migrate

#Once the execution is done, you can see the tables in your database.
#This command may take some more time for execution depending upon your OS configuration & performance
Step 7 – Create an admin User
#
# To Create an admin user run following command

./flow user:create --roles Administrator

# It will ask you username,password,first name & last name

Note – Please do not use easily accessible username & password on staging and production.
Keep your username & password more secured and confidential. 🙂
Step 8 – Set up the Content Repository
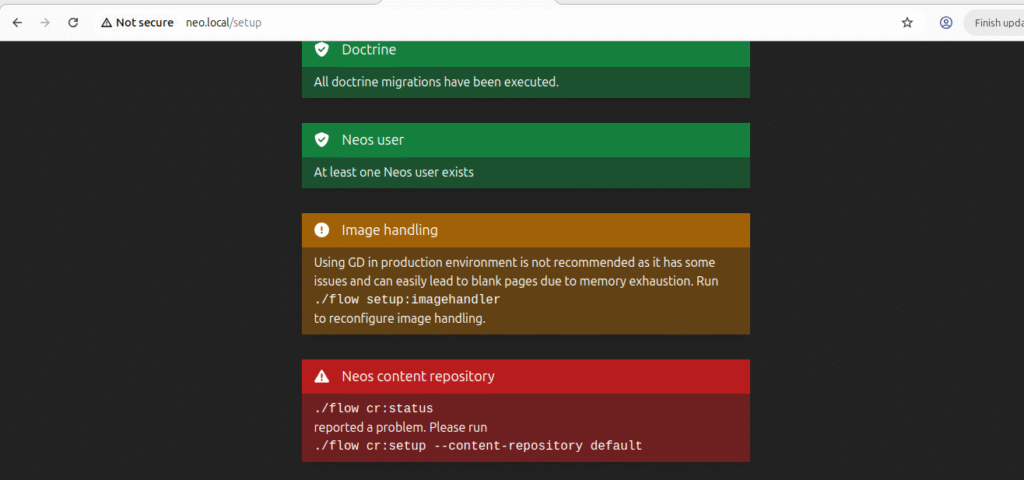
#
# To setup the Neos Content Repository

./flow cr:status

./flow cr:setup --content-repository default

# This will create the database tables for the Content Repository and to initialize an empty event store.
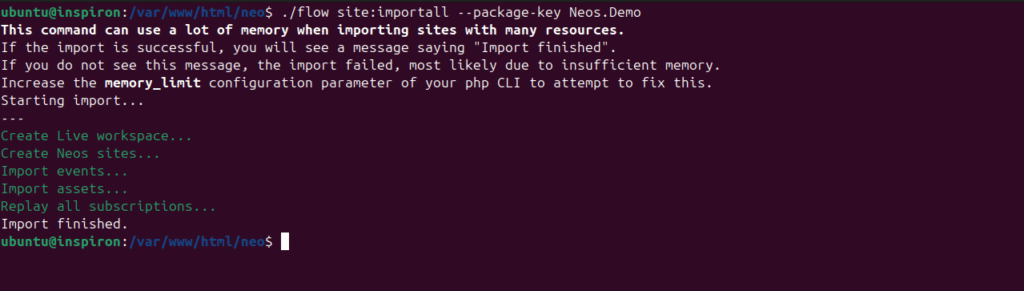
Step 9 (a) – Import a demo site from the demo package
#
# Import Neos Demo Site

./flow site:importall --package-key Neos.Demo

# This will almost finish your setup & then you can access your brand new Neos 9 FE & Back end.
Step 9 (b) – Create an empty site package
To create a plain empty setup, you need to create a new site package and create an site instance
#
# create site package

./flow kickstart:site Vendor.Site

# create site instance

./flow site:create vendor-site Vendor.Site Vendor.Site:Document.Site
Step 10 – You are Done !
Neos will give you the links to explore the backend & frontend too..

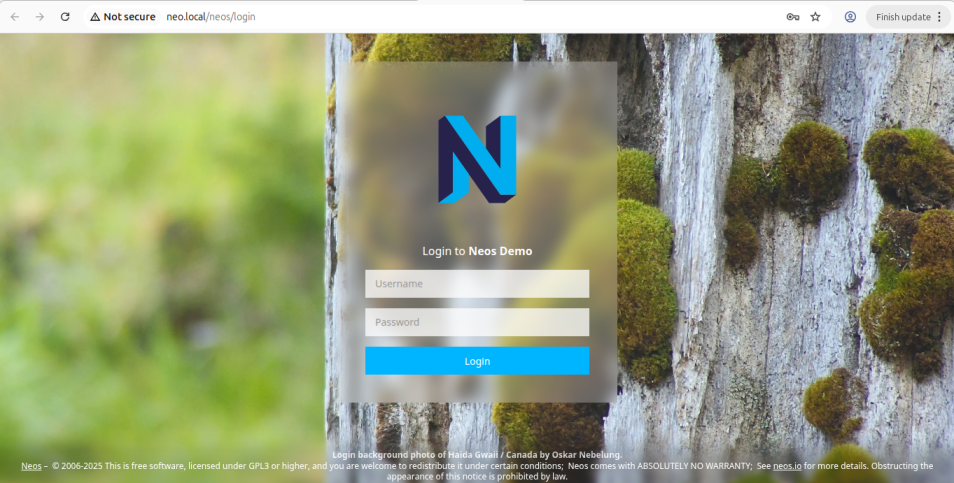
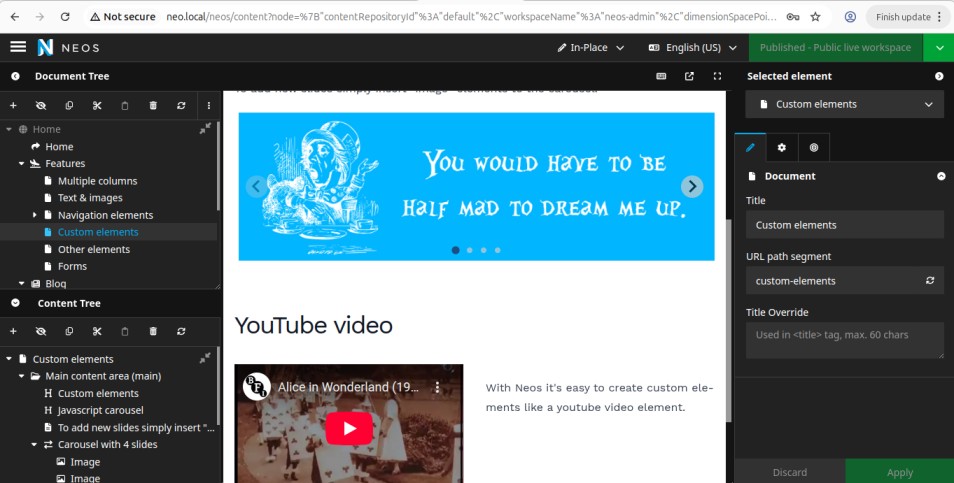
NEOS CMS admin panel looks like this –
Please do visit –
Neos CMS Official Website & Neos CMS Official Documentation for more information
Have a happy coding 🙂